This page has TIPs for the modeler that will save money or make his/her job easier. It also contains projects that I have done and that turned out very well. You will find pictures of the finished models and a PDF or Word file that explains how I did the model. If you have any questions as to how I did something on the model, please feel free to contact me. You can click on the picture to get a larger picture of the model.
Adobe Acrobat Reader is required for some items on this page. Download it for free at www.Adobe.com
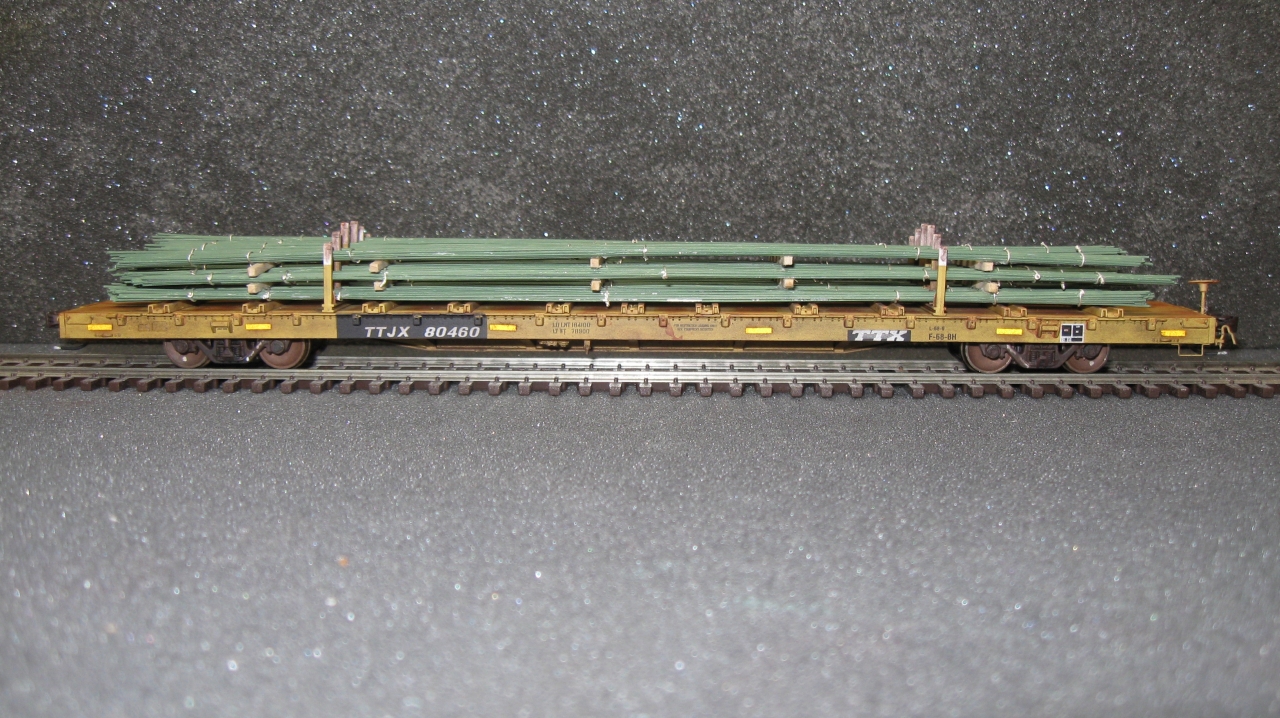
Several years ago, a friend sent me some pictures of a rebar load on a bulkhead flatcar. I thought it would make a nice load, so I purchased a flatcar, and some green florist wire. The floist wire came on a spool, trying to straighen out the wire was a real pain. I did build a couple of rebar bundles, but they didn't look to nice. So, I used the flatcar for another project. When Scale trains announced the finger flatcar I purchased three of them. Now I had to figure out how to make the load. I found a video on You Tube where the builder used 26 gauge tag wire (12 inches long). After some searching, I found the product on E-bay (where else would I find it). I ordered one bundle (1000 pieces). One bundle will do three cars.
I gave this clinic at the 2021 Sunshine Region Convention in Plant City FL. I have included a copy of the Power Point presentation for the clinic: Click Here
I have included the handout for the clinic: Click Here
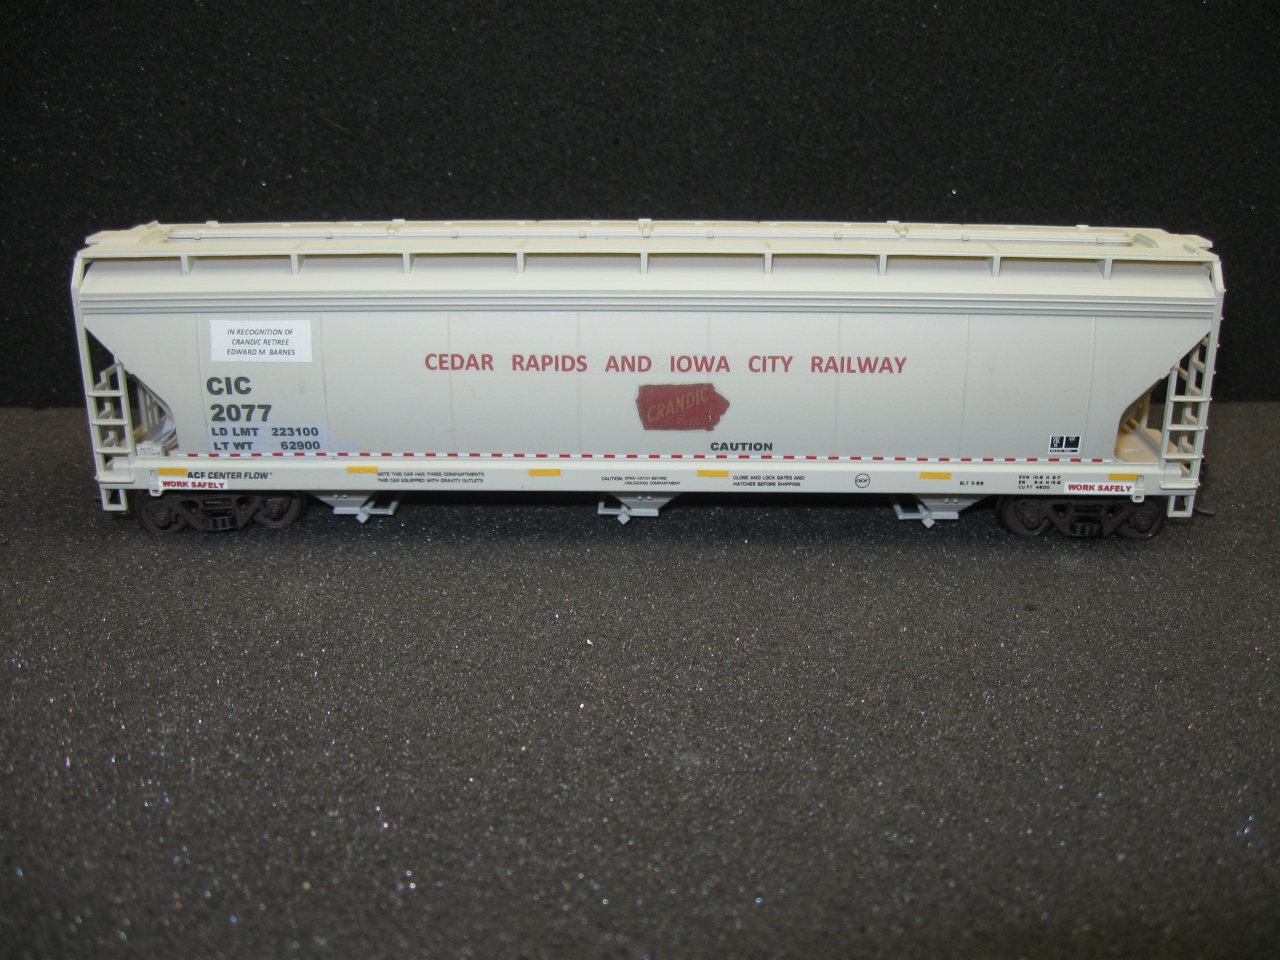
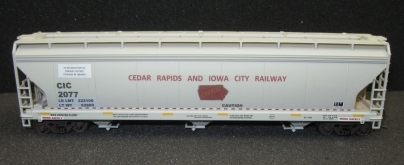
I saw a Missouri pacific covered hopper that had neat looking weathering. I knew the only way to get this look was to do a decal of the car side. The while traveling in Iowa, I saw some CRADNIC covered hoppers and thought it would be nice to have some of them, but no one made the decals for that railroad. I figures it was time to start making decals at home.
I gave this clinic at the 2019 NMRA Convention in Salt Lake City UT. I have included a copy of the Power Point presentation for the clinic: Click Here
I have included the handout for the clinic: Click Here

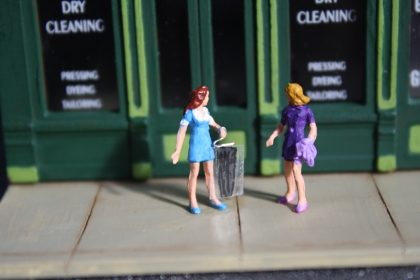
Populating your layout brings it to life. Each scene tells a story with a cast of characters. However, finding just the right figures for the scene can prove to be a challeng. Pre-painted figures are expensive, and the clothing styles or colors may not be correct for your era. The figures are not positioned correctly to convey your intended scenairo. This is where "Frankensteining" your figuress comes into play!
My wife gave this clinic at the 2019 NMRA Convention in Salt Lake City UT. I have included a copy of the Power Point presentation for the clinic: Click Here
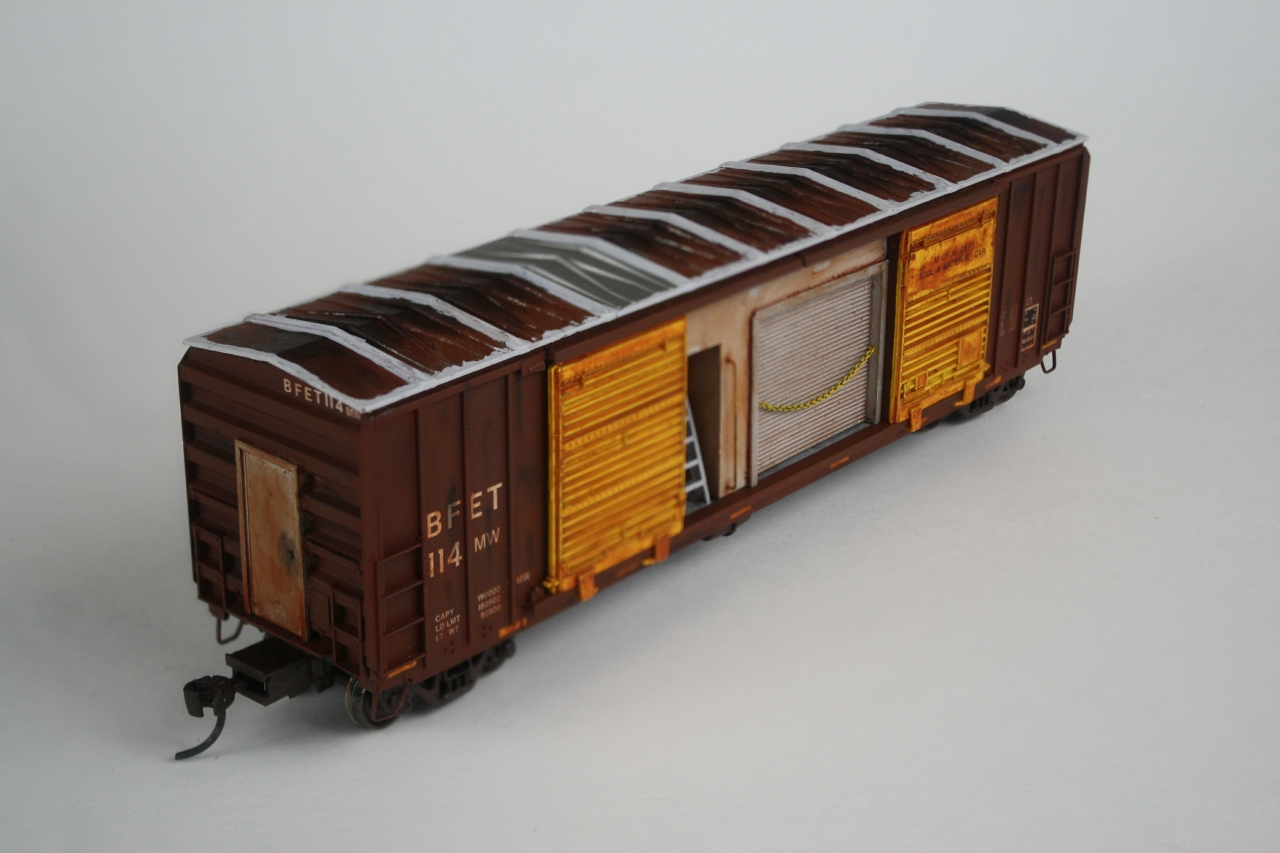
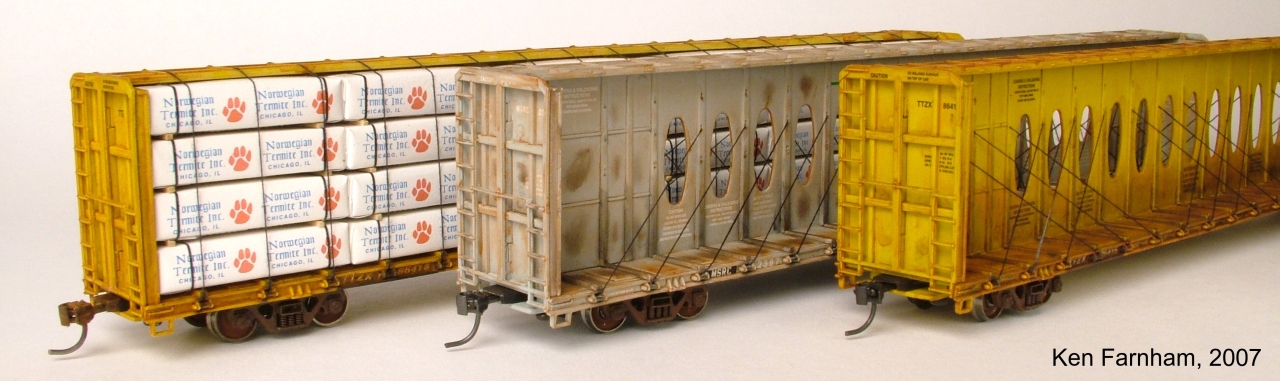
I purchased a ribbon rail train and needed a couple of space cars to run with it. A couple friends had sent me some pictures of Maintenance of Way boxcars (MOW) on NS and CSX. I have used ideas from several different picturesand MOW cars AI had seen to build this car. Just about anything goes with MOW equipment, so be creative!
I gave this clinic at the 2019 NMRA Convention in Salt Lake City UT. I have included a copy of the Power Point presentation for the clinic: Click Here
I have included the handout for the clinic: Click Here
I have included a line drawing for the construction of the door plug: Click Here

A friend of mine sent me the picture above of a very large steel I-beam load on a 89 foot flat car. I thought it would be a nice load to model, so I build one. That got me interested in steel loads, so I build a plate steel load on a 60 foot flat car. That led to me building several more. After I finished the plate steel load, I thought it would be nice to have a 60 foot bulkhead flat cars with normal I-beam load. I started that project, and built several normal I-beam loads. The time required to build each of these models is about four to six hours for each of the 60 foot flat car. The time required to build the extreme I-beam on the 89 foot flat car will take about six to eight hours. The results are worth the time invested; it gives you models that will stand out on your layout.
The 60 foot flat cars carries many different loads, but the plate steel loads are the most interesting. Remmber, no two plate steel loads are alike, so be creative!
I gave this clinic on the 60 foot flat cars with "Steel Loads - Part 1A - Plate Steel" at the 2013 NMRA Convention in Atlanta GA. If you are interested in building a model of the 60 foot flat car with a plate steel load, I have included the handout from the clinic: Click Here
I have included a copy of the Power Point presentation for the clinic: Click Here
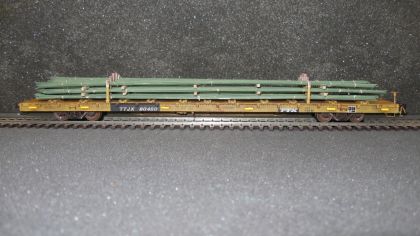
The 60 foot bulkhead flat cars carries many different steel loads. These include pipe, I-beams, plate steel, and rebar. Again, no two loads are alike.
I gave this clinic on the 60 foot bulkhead flat cars with "Steel Loads - Part 1B - Small I Beams" at the 2013 NMRA Convention in Atlanta GA. If you are interested in building a model of the 60 foot bulkhead flat car with a normal I-beam load, I have included the handout from the clinic: Click Here
As I said above, the 89 foot flat car with the extreme I-beam load got this hole project going. I think the beam was a bridge component. There was only one of them in the train. This beam is just under the height limits and is not a "High / Wide" load.
I gave this clinic on "Part 2 - Extreme Steel Loads - Large I Beam" at the 2013 NMRA Convention in Atlanta GA. If you are interested in building a model of the 89 foot flat car with an extreme I-beam load, I have included the handout from the clinic: Click Here
I have included a copy of the Power Point presentation for the clinic: Click Here
I have a line drawing of the extreme I-beam. The drawing requires an 11 X 17 sheet of paper. On the drawing you will find a one inch ruler, adjust the print scale to get that ruler one inch long. This will give you an HO scale version of the drawing. Click Here
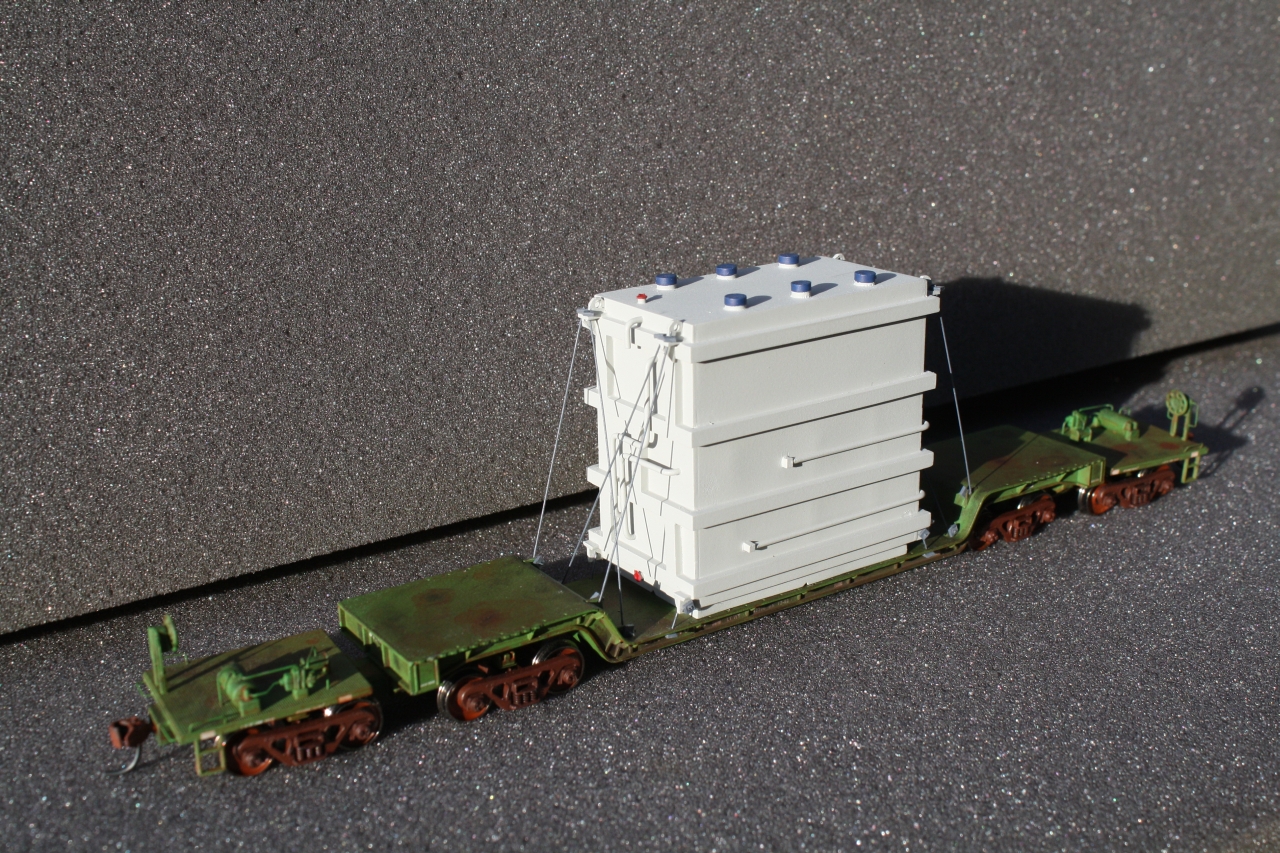
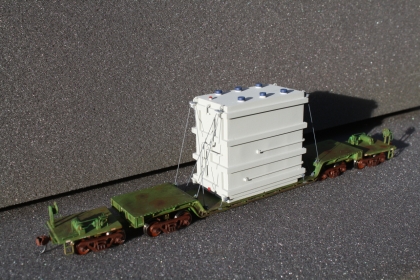
Some of the neatest loads are large transformers, and no two transformers are identical! Some transformers are moved on single truck standard faltcars, some on single truck depressed center faltcars, some on four truck depressed center flatcarr, and the really big transformers are moved on special cars called Schnabel cars.
Building this model gives you a eye catching addition to your rolling stock. This model can be moved in a regular train, or as a special "high/wide" load in a train all by itself. If you want to move the transformer in a special "high/wide" load train, you would need a boxcar or two for the other items that go with the transformer like cooling radiators and transformer oil. You would need a caboose on the rear end of the train for the crew from the transformer manufacturer and observers from the railroad to ride in to keep an eye on the movement.
I gave this clinic on "Large Transformer Loads" at the 2014 NMRA Convention in Cleveland OH. If you are interested in Building a model the four truck depressed canter flatcar with a large transformer load, I have included the handout from the clinic: Click Here
I have included a copy of the Power Point presentation for the clinic: Click Here
I have a line drawing of the transformer that gives the deminsions and pipe placement. On the drawing you will find a one inch ruler, adjust the print scale to get that ruler one inch long. This will give you an HO scale version of the drawing. Click Here
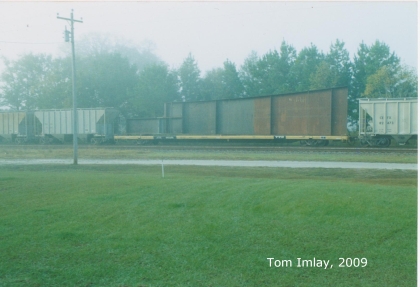
I got interested in the center beam flat cars in 2002. They looked so neat with all the cables on the unloaded cars. All of the different wrappers protecting lumber also added to my interest in this car. I started out to model an empty center beam car. It looked really great. Someone suggested that I do a loaded car with the cables holding in the load. I have completed around 20 models of this car. Some are empty, some with wrapped loads, and some with unwrapped loads. The time required to do this model is about six to eight hours. The results are worth the time invested; it gives you a model that will stand out on your layout.
The center beam flat car carries many different loads. I have seen it loaded with lumber (both dimensional and sheet), dry wall, railroad ties, and wire coils.
I gave this clinic on "Weathering, Cabling, and Loading a Center Bean car" at the 2013 NMRA Convnetion in Atlanta GA. If you are interested in doing a model of the center beam car I have included the handout from the clinic: Click Here
I have included a copy of the Power Point presentation for the clinic: Click Here
I was helping a friend build his HO scale layout. He wanted a double deck layout that could be taken down and moved if his job required him to move. He worked on the track plan for months. He talked with every model railroader that he knew to get advice on the track plan. Finnaly, he was ready to build the layout. We built the bench work, installed the sub roadbed, installed the fascia, and finally started laying track. We wired the track and tested it as we went. After we had completed the track work, we ran the layout for months to make sure the track was bullet proof. At this point, we were ready to install the switch machines. This went rather smoothly until we got the the double cross over. After all the planning that my friend did, he forgot one step. He never did a bench work plan that was the same scale as his track plan. We ended up with a structural support right where two of the switch machines for the double cross over needed to go. We spent a day figuring out how to get the switch machines installed.
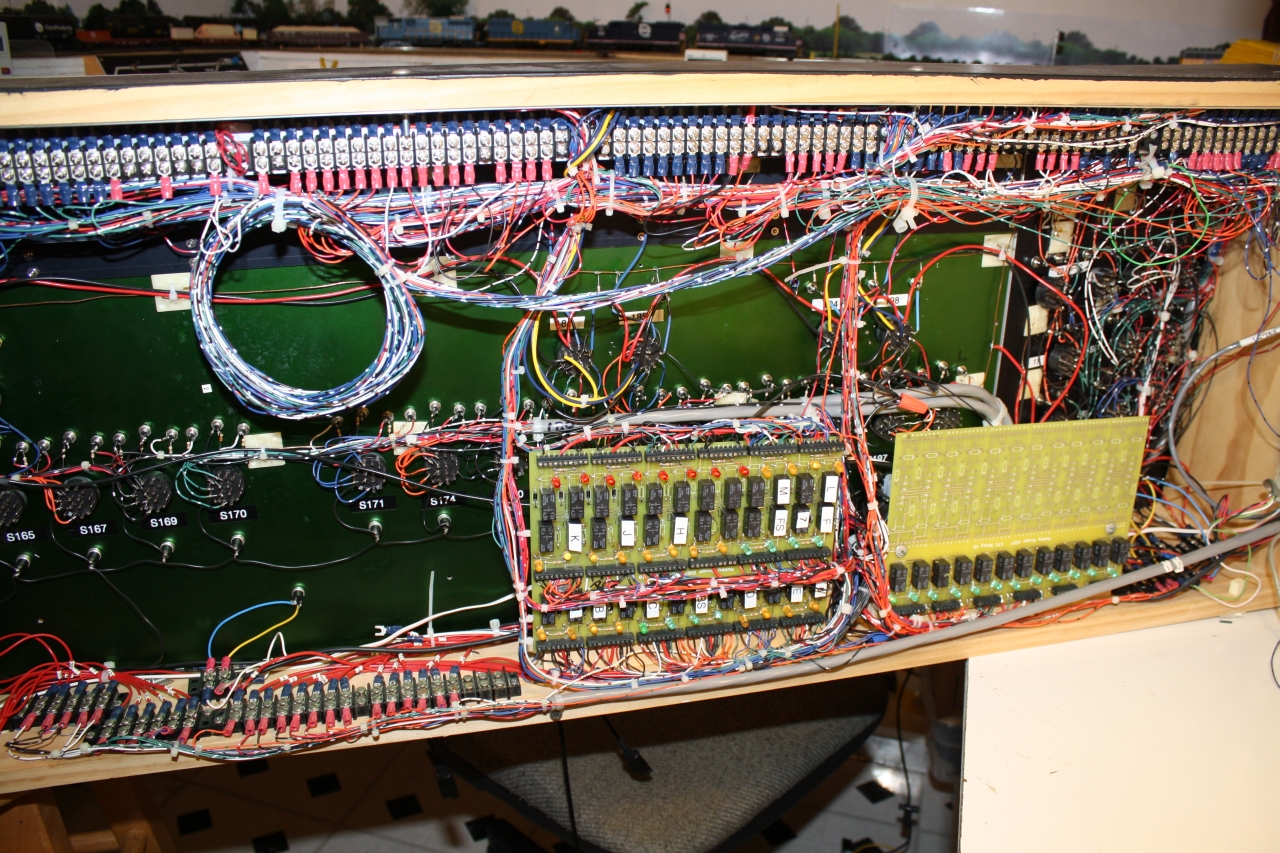
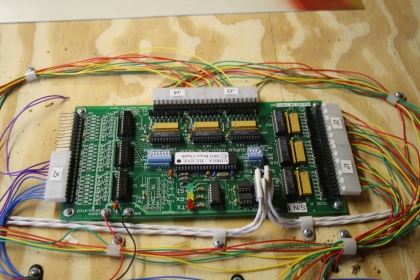
After this day of fun, I decided that I would not make this same mistake when I built my layout. I started working on a "Proof of Concept" layout to design software to control the signals on my railroad. I knew this small railroad was going to be a complicated as a large layout. What I came up with was the "Book of Knowledge" for the railroad. In the"Book of Knowledge" is all the documentation for the railroad, to include a copy of the schematics, SMINI address scheme, manual for the NCE DCC system, signal definitaions, signal rules, hard copy of the software code, a CD with a copy the software, and all of the documentation for the commerical items that I had used. The "Book of Knowledge" is a one stop shop for information on the railroad. The "Book of Knowledge" is a living document, and should be updated ANYTIME you change something on the railroad.
As I was working on the documentation for the "Proof of Concept" layout, it came to me that I sould do a clinic on "Documenting Your Layout."
I gave this clinic on "Documenting Your Layout" at the 2018 NMRA Convnetion in Kansas City MO. I have included the handout for the clinic: Click Here
I have included a copy of the Power Point presentation for the clinic: Click Here
For the schematics, track plan, and other information on the "Proof of Concept" layout Click Here

I have had several people ask me to help them solve electrical problems on their railroads. I was giving my clinic on "Documenting Your Layout" at the 2014 NMRA Convention in Cleveland OH, and had a person suggest that I do a clinic on basic electronics. Electronics is not really hard to understand, just a bit scary when you don't know anything about it. This will not make an expert out of you, but it will remove some of the fear of trying something in the electronics area. I have been working in electronics for almost 40 years, I work as a Senior Engineering Electronics Technician for a large avionics company. I gave this clinic at the 2018 NMRA Convention in Kansas CIty MO.
I have included a copy of the Power Point presentation for the clinic: Click Here
I am building a "Proof of Concept" layout to explore writing code to control the signals using a modern dispatch "point and click" panel. I was asked to do a clinic on Computer Controlled signals for our Eastern Dividion Meet. The idea was to give an overview on what was involved in signaling a model railroad, what is needed for the signal system, and a look at writing the code for the signals.
I gave this clinic at the 2015 Sunshine Region, Eastern Division meet in Orlando FL. I have included a copy of the Power Point presentation for the clinic: Click Here
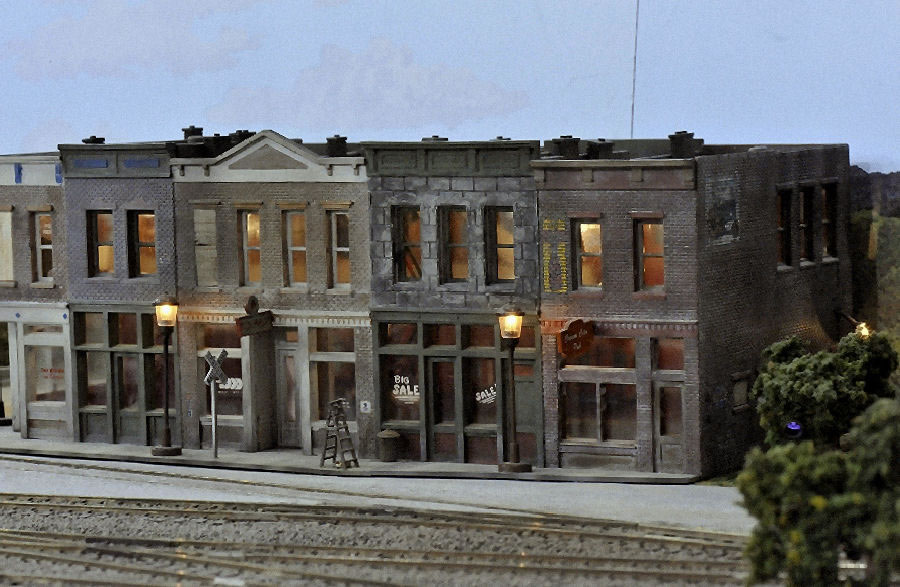
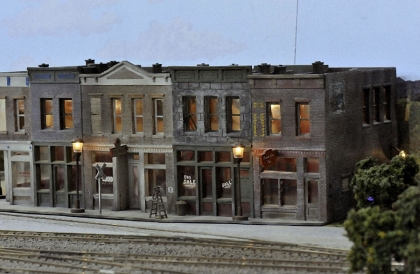
Have you ever visited a layout where the models of the buildings were nice, but they were just missing something? After some thought you figure out what it was missing, none of the buildings are weathered or detailed. A lot of modelers will detail their rolling stock and locomotives, but never detail the buildings. Have you ever seen building that "glowed" when the layout room was dark and the building lights were on? This is something that really gets my wife going. She gave this clinic on "Detailing and Weathering Structures" at the 2021 Sunshine Region Convention in Plant City FL.
I have included the handout for the clinic: Click Here
I have included a copy of the Power Point presentation for the clinic: Click Here
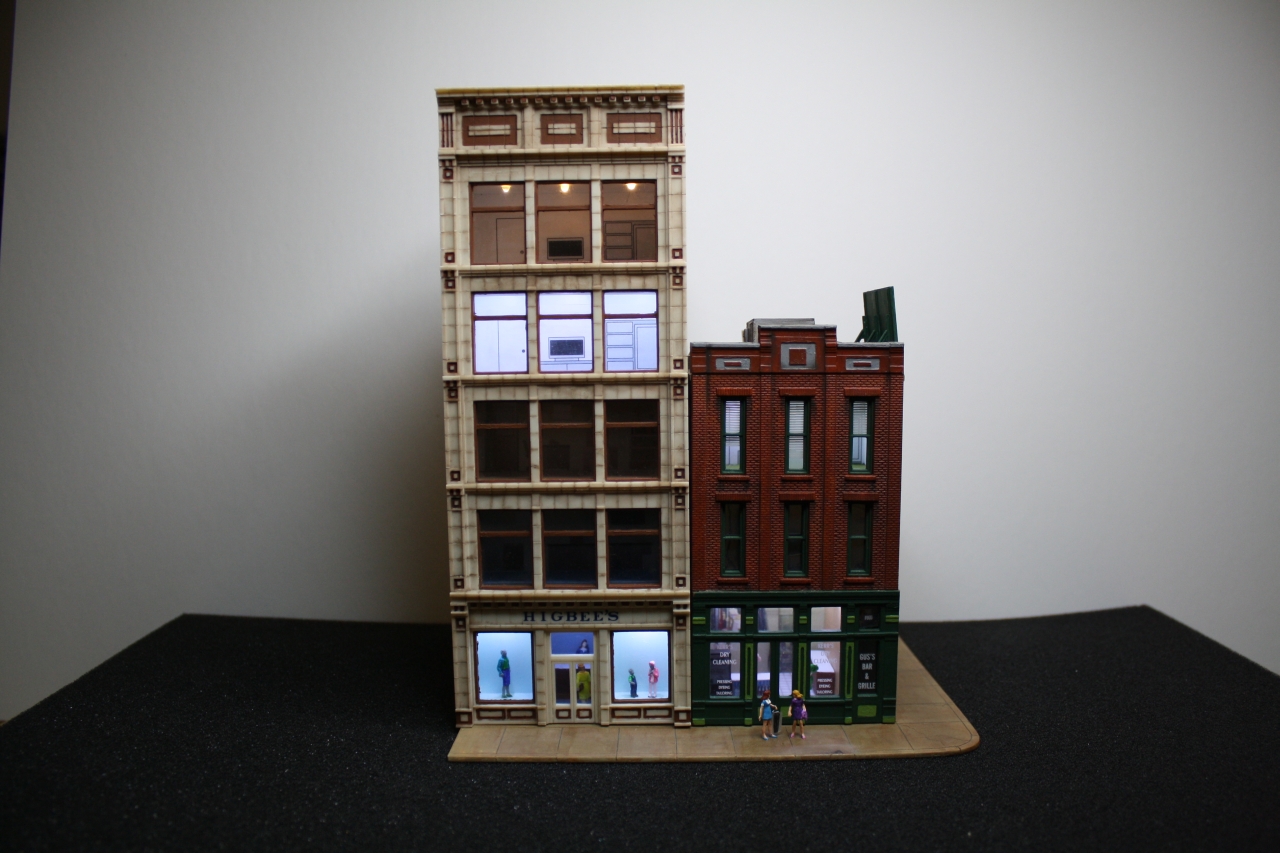
The next thing to be done on a building is the interior. Depending on where the structure is located on the layout, the loacation will drive how much interior detail you should do. My decided the next clinic she was going to do was on detailing the interior of the buildings. She gave this clinic on "Adding Interior Details" at the 2021 Sunshine Region Convention in Plant City FL.
I have included the handout for the clinic: Click Here
I have included a copy of the Power Point presentation for the clinic: Click Here
Do you know just how much a car should weigh? You don't remember where to find the information? You know that the NMRA has a Recommended Practice, but can't remember what it is? Well, don't look any farther: Click Here
Here's a TIP that will save you money! Rather than purchase the sanding boards at your local hobby shop, go to Sally's Beauty Supply and get nail files. There are many different grits and they are about 1/3 to 1/4 the cost of the same item in the hobby shop.
While in Sally's pick up some Beauty Secrets Nail glue. This is a stronger form of super glue. It has a longer "working time" and is stronger. To set it instantly, use All Seasons Bio-Set Activator.
Need a flat surface for sanding? You could go to a glass shop and purchase a one inch thick piece of plate glass, but this is expensive and that thickness is hard to find. You are better off to go to a cabinet shop and get the piece of counter top that was cut out for a sink. This cut out is a scrap piece, and more than likely they will give it to you and it will work just as well as the plate glass.
Need "scale" cable? Look in the jewelry supply section of your local craft store. Most carry several different sizes of stainless steel "wire rope" that is used to make necklaces. Build a wooden cable spool, and wrap at least one layer of the "cable" around it. Now you have a good-looking cable spool to ship to a customer on your railroad.
|
|
|
|
|
|
|
|
 |
|
|
|
|
|
|

Last update to this page was October 14, 2021